Posted by Roadwolf on November 29, 2025
Blog and Journal Hobbies
Welcome to a bit of a rabbit hole. I was recently told of an estate sale in the Buffalo area. A prominent attorney, Daniel Tronolone, had passed, and in his estate was the remains of the House of Fischer pipe collection. He had acquired this collection because Art Fischer was a close personal friend of Daniel Tronolone, and knowing the attourney was an avid pipe enthusist, Art had willed the remaining pipe stock to Daniel in his passing. This is the backstory I had heard through word of mouth. Read more
Posted by Roadwolf on July 3, 2025
Hobbies
Tactical Fox: The Next Level of Fox Hunt
I have been working on a new type of HAM Radio game. My firends and I used to play something like this, up in Toronto in the mid 2000's when we were messing around. This is like a fox hunt, but the fox doesn't transmitt. Instead, the chase vehicles - or hunters, must transmit. The fox has to complete their objectives and the chase vehicles must solve the code. Read more
Posted by Roadwolf on September 5, 2024
Blog and Journal Hobbies Thoughts and Politics
I have been having a lot of fun and doing a great deal of research related to, what is essentially, my virtual model railroad. My RailOps project is pretty much at Alpha testing stage now, and I will happily provide a link for interested parties to apply for an account. My SVNO rail line, runs from Northern Ontario through New York and is headed down the East side of the Mississippi River. Currently the Southern terminus is near Columbus, Ohio.

The current rail network is made up of four rail companies. And it seems that railcars and goods are interchanging betweem them just fine. Currently I have over 300 industries, trading over 400 different products. There are supply chains and for sure a need to link suppliers up with consumers.
As I expand my rail network, and also develop and define the industries to handle realistic material and create a realistic supply chain, I am learning more and more about our world. I will say that I am utterly shocked about just how many different products and chemicals are made from just Natural Gas, Air and Water. It is bewildering. Another thing I stumbled across was this gem below. What kind of mine or operation was this? This is located just along my SVNO mainline coming into Ohio from West of Pittsburgh. At first very little information could be found about it. Read more
Posted by Roadwolf on August 17, 2024
Blog and Journal Hobbies
I have trains moving on my virtual model rail network now. I have railcars being exchanged and being loaded at industries. Seems good, right? It is!
But I ran into an issue. In my testing, I have the ability to add railcars to whatever company I see fit. It is like a cheat code. But there was a little mix up in the coding. I had a Bulk Railcar Add feature, which would add a group of a user defined number oif railcars under the chosen company's name, starting at a user defined numbering scheme, and counting up.
So I went and said okay, I want some hopper cars to carry some coal. Maybe 25 of them, and let's start numbering them at 33500?
So that made 33500 hopper cars, with the numbering starting at 25. It looks like I got some input variables switched around. Oh well, easy fix.
What wasn't quite as easy of a fix was the intense issues that I ran into when those 33500 railcars, all ending up in a single railyard, began being sorted at that railyard. The program bogged down the system and I eventually had to stop all processes and delete all railcars to fix it. So this displayed to me that there is obviously a limitation. Which is good to understand, especially early on.
33500 railcars is only a small fraction of the total real railcars in the North American system. There are well over a million railcars out there roaming the tracks in real life. So, if 33500 could bog down the scripting, and this was intended to be a representation of the real network, then I have to rethink how things are done.
Original Concept:
The main plan was to have a web page based multiplayer rail network, all hosted on one of my web servers, and able to be played interactively by no more than 100 or so people.
Possible Secondary Concept:
I was thinking last night that it could be possible to use the base framework, mostly from the industry and materials standpoint, and use that as a basis for a standalone version of the game where a single player could work on their own network, locally on their own computer. It would use the industries, materials, and processes that are defined, but their track and rail system would be stored and operated locally.
The original concept could still work in conjuction with that also, and since there will be limited space for multiplayer, it might be a premium feature.
I am thinking that this will all need to be hosted on my own box, as I think it will need the processing power of a full server, and not just a virtual space in a shared server. I do have a couple WAMP servers running from my little server farm, but the infrastructure was never built out to such an extent to really support such an operation. I do intend on setting up a LAMP server anyhow, in order to handle the open-elevation hosting as apparently that doesn't work well on WAMP. So we shall see. I do know I am likely going to be getting another static IP soon, and a fiber connection, so that will better facilitate hosting.
UPDATE:
I was able to move things over to my existing server without much hastle. There are still a few things to figure out, but for the most part things seem happy. Since my local server is WAMP based, it is a little different from the Linux system I was used to running on, so things like CRON jobs are a little different now. I am working on setting those up when time permits. The CRON jobs are important for the project as they are what handle the progression of time and movement of trains and materials.
For those interested, i'll link to the public information portion:
Global Material stats: http://dev.railops.us/public/publicstats.php
Global Map: http://dev.railops.us/public/publicmap.php
Currently I am just using HTTP and not HTTPS. So it will be all like *** WARNING THIS SITE ISNT SECURE *** but.... it's just a basic website. It's not like it will be asking for any payment info or phone numbers. I plan on getting HTTPS set up soon enough. Read more
Posted by Roadwolf on August 3, 2024
Hobbies
My Rail Operations Simulator project is progressing slowly forward with every week. This past week saw the first 'train' move across it's simulated lines. To get a train to move I had to rethink a few of the ways I handled things. So I still need to go back and fix other related operations. But generally, the backbone of how a user can join, establish their first track, and build that track into a working subdivision is in place. Yards are set up as well. Read more
Posted by Roadwolf on December 11, 2023
Blog and Journal Hobbies
I sit up in my Lofty Lair trying to find inspiration to do something meaningful. So I decided to write this post to try to sort things out. I am working on two main projects in my life right now. Read more
Posted by Roadwolf on October 25, 2023
Roleplay and Fantasy Hobbies
SVNO: Scajaquada Valley Northern Railway
The Scajaquada Valley Northern is a fictional short line railroad serving remote communities in a Northern and Mountain region in North America. The initial nationality was going to be Canadian, however it could easily be located in the Adirondaks or Northern Maine. The railroad draws a large amount of inspiration from the Ontario Northland Railroad which serves Northern Ontario well, and provides not only the only land link to several Northern Communities which are otherwise inaccessible, but also Whistle Stop / Flag Stop passenger service to remote areas. The Whistle Stop / Flag Stop service is a hold over from the early Steam days when passengers could stop a train anywhere to board or disembark. Read more
Posted by Roadwolf on September 26, 2023
Hobbies
My Carriage House's Loft has been neglected for a while. The main chunk of work to make it what it is today, spanned from 2017 to 2019. But it has sat in limbo pretty much ever since. It is a shame really, as it is a great hobby space. The plan for the room changed a few times. A sound studio, for mixing small bands with a nice mixer and effects suite was one such idea. But frankly I am much too old school to keep up with the changes in the music industry. The Lofty Lair was an idea for a private adult lounge. But I scrapped that idea back in 2018. The Model Railroad / Hobby room has been on the table a few times, and is the dominant inspiration behind the room going forward. Read more
Posted by Roadwolf on June 4, 2021
Blog and Journal Hobbies
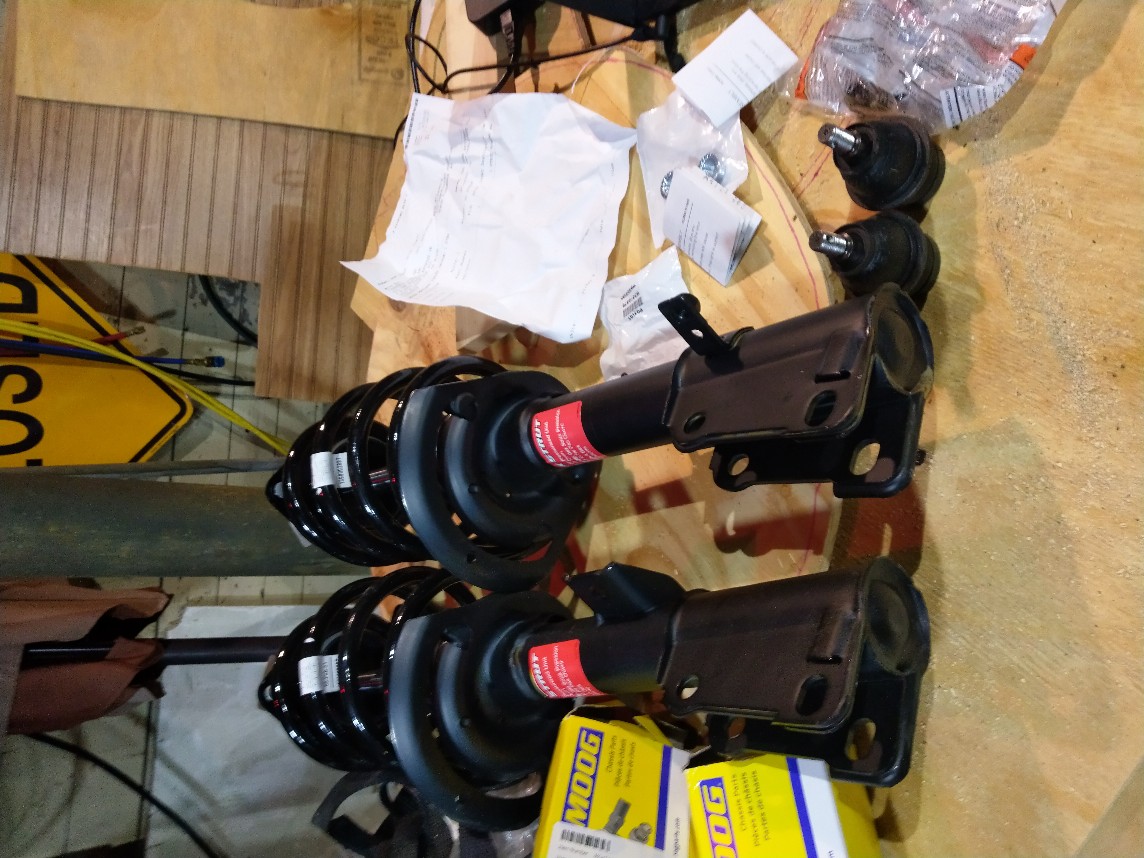
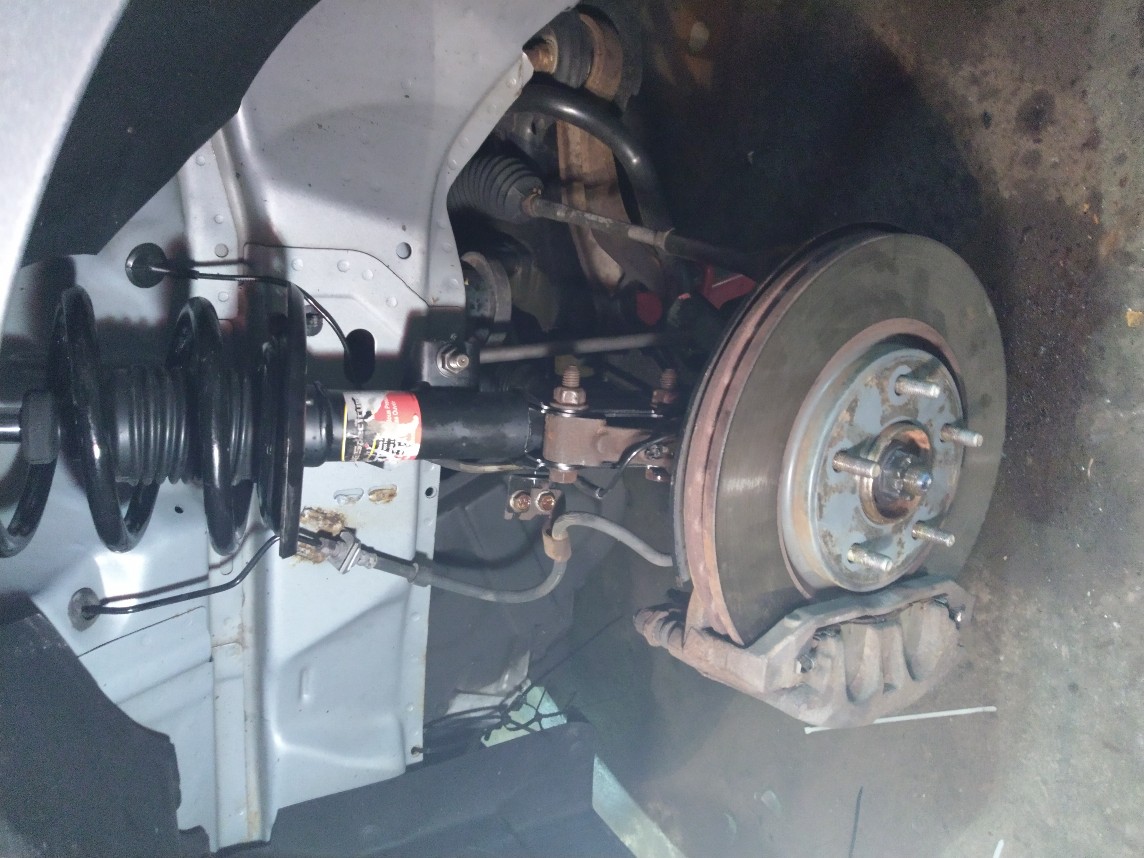
One of my not so fun tasks this vacation was to tackle my Journey's front suspension issue. I didn't know what was going on, but ended up being the main cause of my noise in the front end was a bad Left side Ball Joint. I was ready for this! I had already purchased all of the components for the front suspension as I wanted to replace it all anyhow.
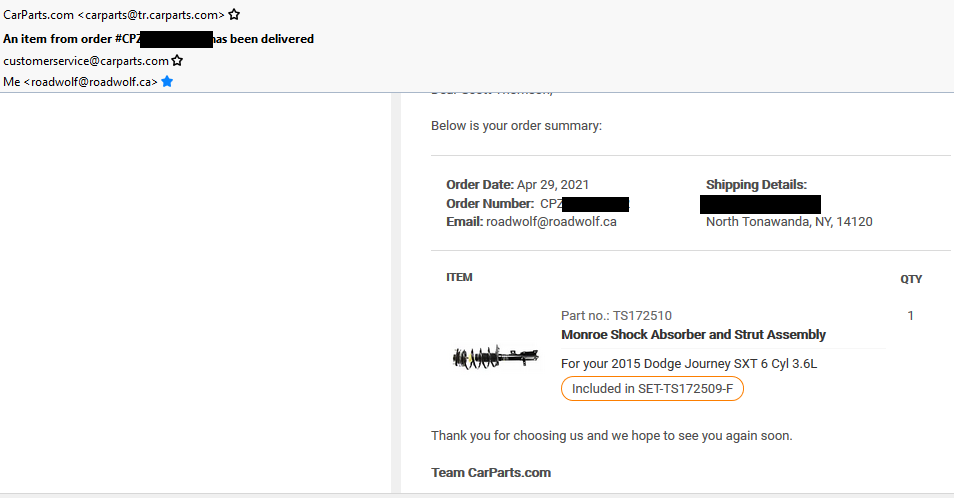
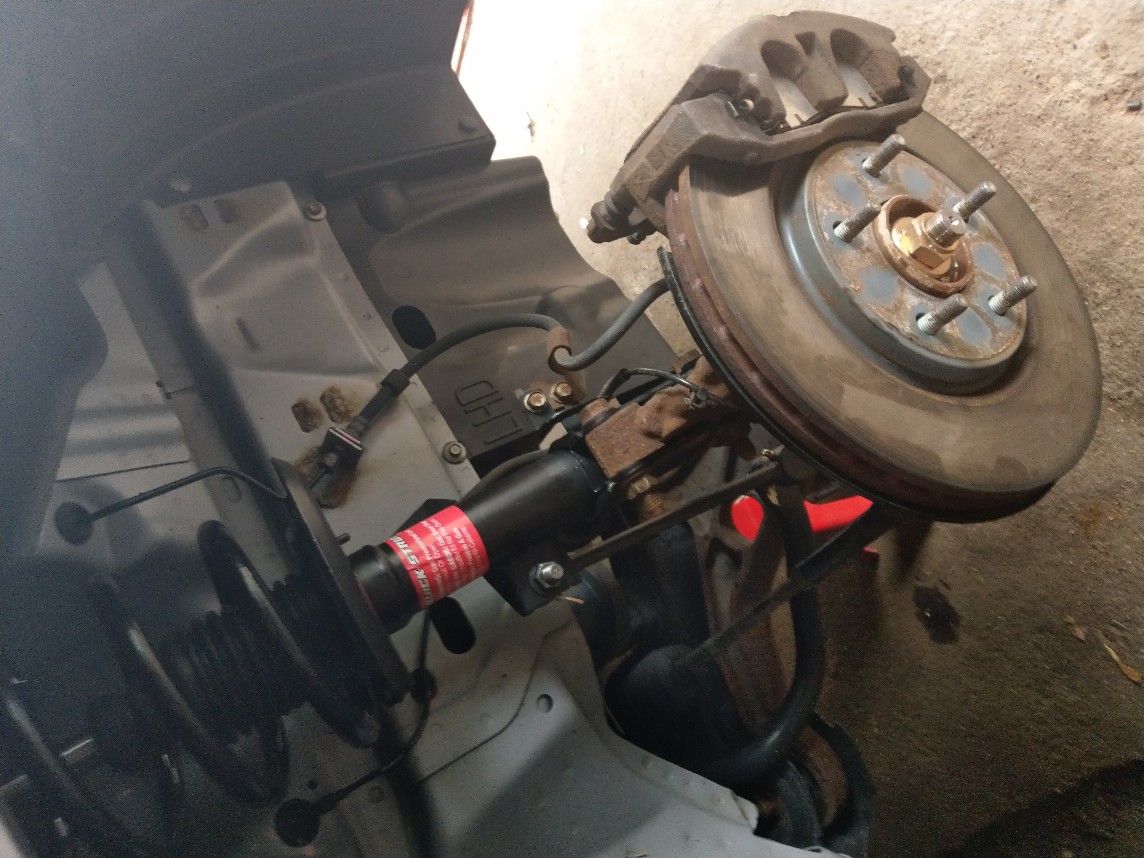
I purchased most of the components from CarParts.com. The Moog Ball Joints they sent were perfect. However they were poorly packed in a simple padded USPS type envelope. I don't believe I got much of a deal on them anyhow. I also bought my loaded struts from there as part of the same order. I ordered SET-TS172509-F which CarParts.com described as Monroe Shock Absorber and Strut Assembly. They were not Monroe shocks.

On top of that, they promised 3 day delivery. They arrived separately, one after about 7 days and the other after about 15 days. They did however try to bribe me with a $100 voucher for wine. Surprisingly it was valid and worked, so I did end up buying some wine.

They did however fit and I ended up using them. But I was unhappy and instead of complaining to a company which as far as I am aware is based out of China, I will just blacklist them in the future and let my readers know NEVER to order anything from this site if they actually care about what they are specifically ordering and when they will receive it. I'd just say don't use this site. RockAuto is a great site... I don't know why I didn't go with that to begin with.

The job began slow. The Left side's ball joint was bad, so I wanted to tackle that first. The Dodge Journey's Ball Joint's are kind of screwed up. Probably designed by people with Common Core math - because you cant properly use a compression tool to remove and insert this ball joint. I am sure there is a custom tool available. But the typical ones you rent or buy will not really fully do the trick.

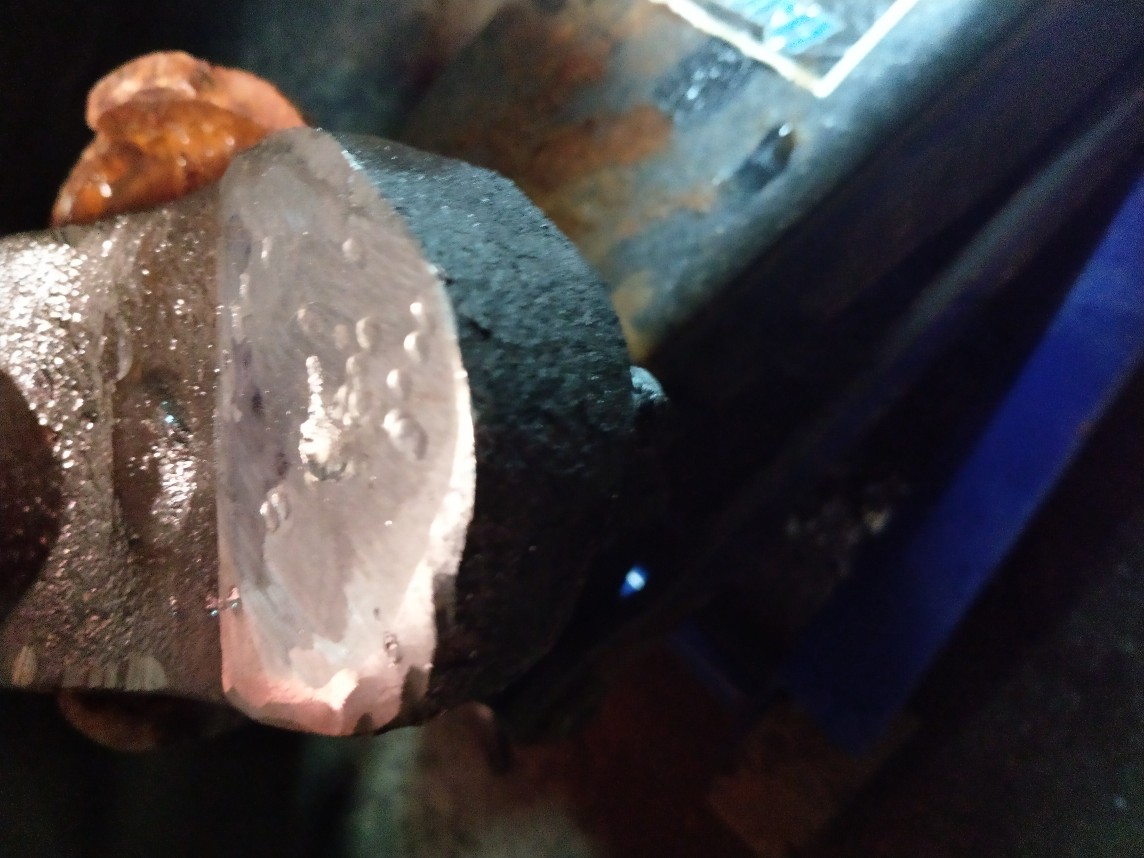
My snapring was so rusted in place I ended up saying fuck it and used my cutting disc to cut it off. And like the dummy I am I ended up going a bit far and cut into the actual wheel hub. Was able to get the ball joint out with the help of an air hammer, and then welded the wheel hub back together. Don't pay attention to the lack of safety gear. No chest hairs were harmed in process.

I inserted the new ball joint and ended up having to hammer it in (using a compression cup over it). Sadly the wheel hub weld fix didn't seem solid so I ran a few more beads over it. I am hoping it holds out and to be sure I actually said fuck it and welded the Ball Joint in place too. But at the same time I ordered a new Wheel Hub assembly (not from CarParts.com) and plan on just replacing that out at the first sign of trouble. I don't trust that fix really. I kinda messed up.

I like using my cutting disc, and ended up cutting more of the bolts for the items I was replacing off. One of them was the old Ball Joint connecting to the control arm. Again I was a bit dipsy and couldn't figure out why I wasn't able to just pop the cut off bolt out. Well, turns out it is tapered. So a friend who stopped by gave it a few whacks from below and it shot out!. I had tried tapping on it from below prior to that too, but it didn't budge for me when I attempted. So I dunno. He is just magical.

Aside from those two issues, which were honestly mostly self induced, the biggest pains were trying to unclip the speed sensor cable from inside the engine compartment. That was a long reach for a fat guy like me. The other issue was removing the plastic from the wiper shrouds. I didn't fully remove it, as I didn't want to remove the wipers. But I just hate those plastic anchor 'bolts' or rivets. Otherwise, the stabilizer (aka sway bar?) links and the struts went in fairly easily.
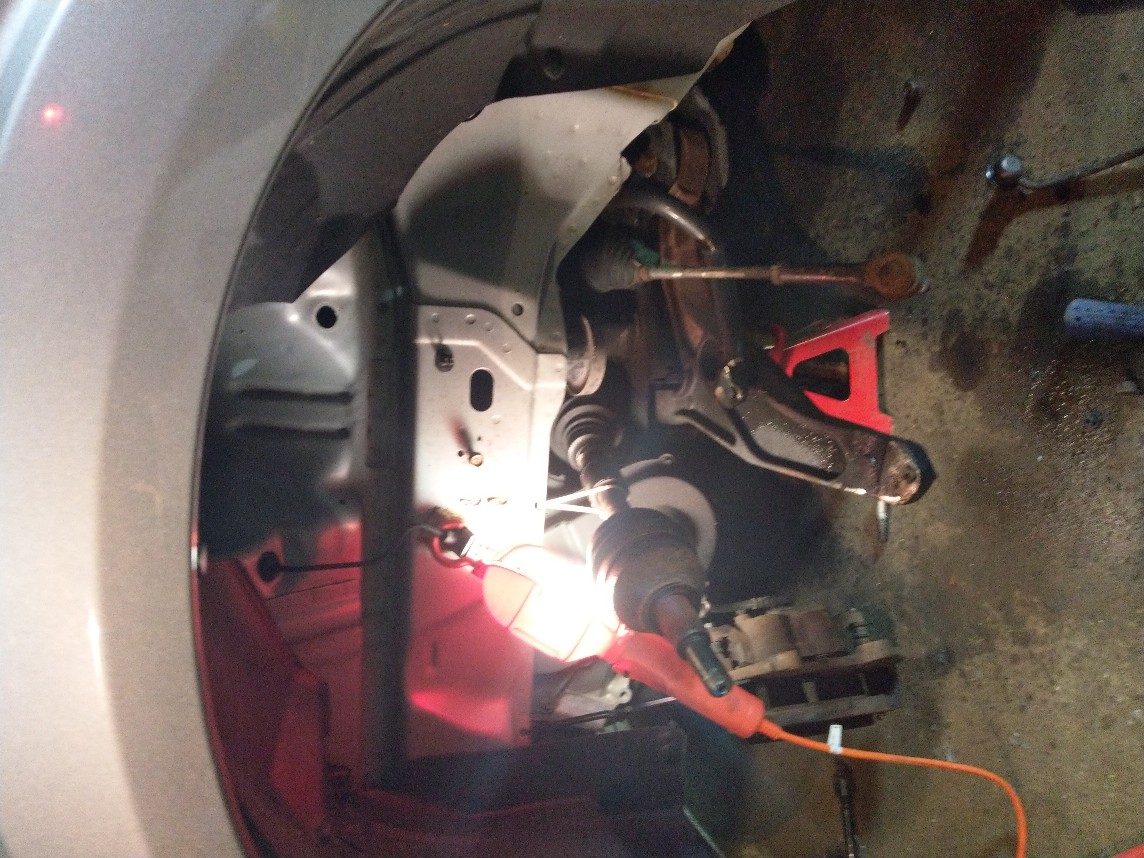
Having never owned a vehicle with such a loaded strut assembly in place, I was surprised to discover that the whole strut turns and moves as part of the steering. I had previously only owned vehicles with wheel hub assemblies that were the only things that moved with the steering. I can see how this set up had less moving parts to deal with, but I am amazed that this set up doesn't bind up over time. Or does it?
The other side went a lot smoother, as I was just doing the strut and stabilizer link, which was really about an hour long job.
Anyhow, I figured I would have to get an alignment, but it seems to be driving nice and straight.
Woo! Good job Roadwolf. You still have it in ya. Sorry for the fat guy pics, lol Tho I have heard some people find it attractive to see a guy working. Read more
Posted by Roadwolf on April 28, 2021
Hobbies Blog and Journal
It is 2021. T1? What does that mean?
Ha, well.. T1's were something that were popular when I was just getting into the industry in the late 1990's and early 2000's. But they were beginning to loose favor by 2010 as SIP / VoIP options began to become more economical and fiber backbones became more widespread.
But one thing can not be denied. In terms of robustness, a T1 line from point to point is typically VERY solid.
Where I work, we use T1's for several point to point critical infrastructure systems. We were actually still running a Cisco SONET fiber ring 15454 up until April 2021! The T1's would route over that system out to their various locations. Prior to this we used copper hardline and CO repeaters.
This system was Aging. I fully believe the Cisco SONET 15454 was made useless by the Y2K bug fix, as January 1st, 2020 the SONET user interface ceased to be functional, and it corrupted the kernel on our monitoring workstation. For over a year the SONET ran without the ability for us to maintain it or read logs, or do anything. Luckily it was solid enough to do it's job without complaining much. For a system that was 10 years beyond it's useful life, that is a huge show of hardness.
This year it was my goal to work all of the major systems off of the aging SONET system. And my self imposed deadline was April 2021. Now keep in mind, this is a project I started and worked on on my own. My workplace was so caught up in their own red tape and lack of understanding that - while this was on their drawing board, nothing was being done about it.
I disconnected the SONET in the first week of April! My new system, using an ERPS ring with AdTran 8044M's was complete, and all of my T1's were transferred over and functional enough to be useful. I completed my goal, and just in time. As a few hours before the last T1's were to be moved off of the old SONET, that SONET failed, and those T1's went down! Luckily the 8044M was in place as was the cabling to quickly transfer the T1's over to the new system and get it back online.
But then began a strange issue. See I have never really dealt with setting up a CO network of T1's. Usually when I dealt with T1's, I dealt with client side T1's, and the CO side of things was already set up. So yeah I was still learning when I set up this super important critical infrastructure system. I had read that there was only supposed to be one clock source, but I had 2 8044's at my CO location. Each of which handling 8 T1's. The T1's like I said, are point to point, so they all originate from the CO location, and head out to various locations.
I had wrongly set the 2nd CO 8044, to packet timing client mode, off of the first 8044.
So the 8 T1's originating from the 2nd 8044 at the CO all had packet timing issues. But I didn't quite catch that right away. For one, they all seemed to work... Kind of. Every 12 minutes or so, I would get an interruption from one of the Fire Department audio lines, which would unsquelch their radio system.
With several other projects on the go, it took me a while to come back to this issue to revisit it. But I did have a theory it was clock or timing related.
Tonight I was checking the units and saw that the T1 channel banks's all used to have clock inputs but the wire on the wire wrap was cut. So I was thinking okay if the CO T1's had timing at one time, then why don't they now? Then I realized... The SONET was the timing, and then I realized that the packet timing on the AdTran 8044 was also the timing. I don't know why that didn't quite click in until just now. But it hit me like a pallet of falling bricks. Hell yeah.
So I logged in and checked, and sure enough the 8 locations off of the 2nd 8044 were all showing packet alarms. So I fixed that up, by making the 2nd 8044 at the CO it's own packet server instead of a client, and then set up the other locations to point to that unit that they are pointed to anyhow with the T1, to look for packet timing there. And yeah... that fixed it :)
Woo. Fun stuff.
I hope my T1's live for many many more years. lol Read more

